I’ve been sadly neglecting AppSense’s DataNow product on this blog, but given that I am in the middle of doing a big comparison article on EFSS (Enterprise File Sync and Sharing) software, I thought now would be a good time to change that slightly. For the aforementioned article, I’ve been having to set up a lot of EFSS software to run in my lab. So for anyone who fancies doing it also, here’s a quick guide to setting up the DataNow appliance in a lab environment.
Hypervisor
I’m using the latest version of the appliance (3.0.3.1, at time of writing), and I am running my lab on Windows 8.1 client-side Hyper-V (on my new PC packing 48GB of RAM, which just feels so strange given that my first PC had only 4MB). On the AppSense website you will see that there are appliances for Hyper-V and ESXi/VSphere, but they should run equally well on client Hyper-V or VMware Workstation. On Windows 8.1 Hyper-V, you will need the 2012 R2 appliance version.
Lab pre-requisites
Given the way that DataNow works (leveraging on-premise storage to create a DropBox/OneDrive/ShareFile type of collaboration), you will also need another virtual machine running in your lab – an Active Directory domain controller. Whilst some people may say “yeah, right!” at this prospect, if you’re serious about testing and developing your skills, then a properly-equipped home lab, in this day and age, is very much a pre-requisite. Cloud services haven’t cheapened enough for me to (yet) think about hosting my setup in Azure or AWS (a lab with 48GB of RAM running pretty much non-stop and doubling up as a media server with over 8TB of storage would cost a small fortune currently), so running it in-house (so to speak) is currently the most cost-effective mechanism. I also find that running a lab keeps your day-to-day skills up-to-date – without it, I wouldn’t keep getting my hands dirty with network and DNS problems, amongst many others. So get down to it and quickly spin yourself up a domain controller!
Next you will need to get the DataNow appliance downloaded from the AppSense website, as appropriate for your hypervisor. Whilst this is ticking away, we can probably start on some other pre-requisite tasks.
Other pre-requisites
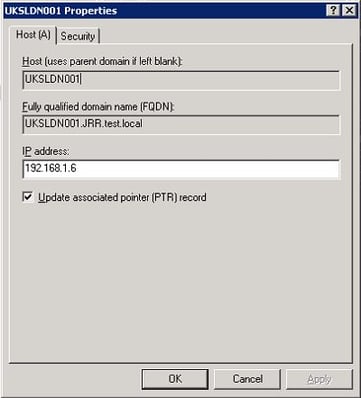
Firstly, set up a static DNS record for the DataNow appliance in your internal network. DataNow can’t use DHCP addresses, so an address that is outside of your DHCP range needs to be set up specifically for it.
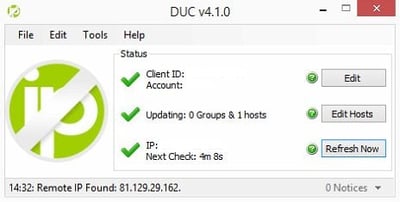
It would also be a very good idea to set up a dynamic DNS service (unless you have an external static IP address, which is more and more uncommon these days). If you don’t set up dynamic DNS, then you will have to work out your public IP and connect to it when you’re accessing your DataNow appliance externally – expect to spend a lot of time Googling “what is my IP?”, especially if it changes in-session. There are good free dynamic DNS services out there – No-IP being the one I use since DynDNS became a paid option. It doesn’t take long to sign up and it will save you a lot of bother, so it makes sense to set it up at this stage.
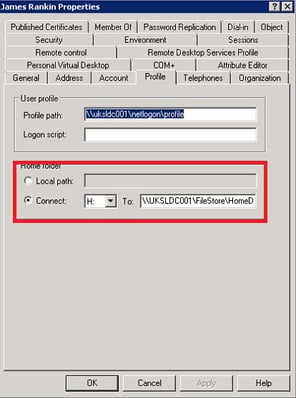
Also ensure that users who will be accessing the DataNow appliance have a home directory set in your AD, as this is how files will initially be accessed.
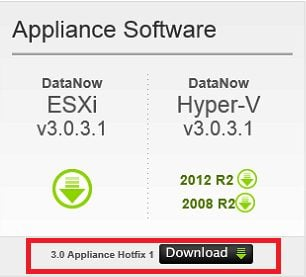
By this time, unless you live in Norfolk, your appliance should have finished downloading long hence. Don’t forget to download any applicable hotfixes also (see image below).
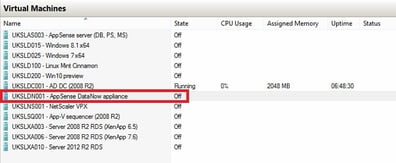
Once your downloads are finished, it is then time to import the appliance into your hypervisor.
Configuring the appliance
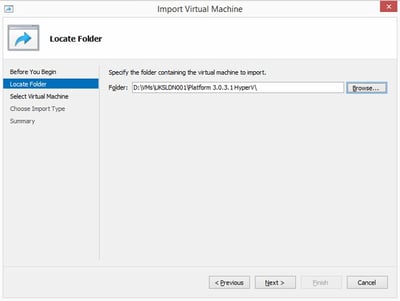
Once you’ve extracted the zip file(s), the appliance needs to be set up in your hypervisor. On Hyper-V, I open the management console and choose the Import function, before selecting the folder where I have extracted the DataNow appliance files to.
Click Next
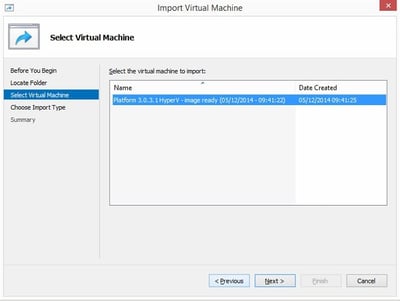
Click Next
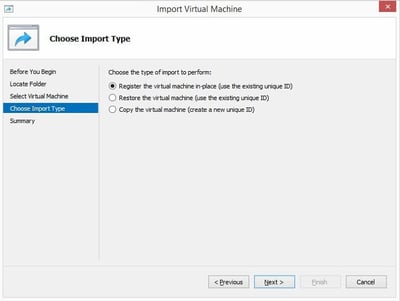
Click Next again at the Choose Import Type screen
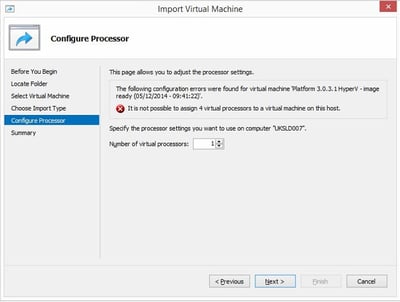
By default the DataNow appliance requires 4 virtual processors, but this is neither necessary (nor possible, in my case). The DataNow appliance will run just fine in a lab environment with 1 vCPU, so set the option to 1 and click Next again.
Click Finish at the final summary screen, and you will see that your virtual machine has been imported successfully.
The appliance will also use, by default, 4GB of RAM. Even if you have oodles of it, it makes sense not to overcommit, so we will reduce it down to 2GB by right-clicking the VM and choosing Settings
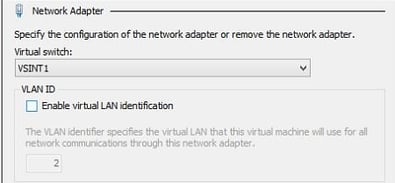
Also, the machine is not connected by default to a network, so attach a virtual NIC at this stage too. I have the Hyper-V virtual switch connected directly to the host’s external network, which makes it simpler from a troubleshooting perspective, but be aware there may be security considerations around not putting your machines into a separate virtual network.
Now we can switch the VM on and start some configuration.
Initial configuration
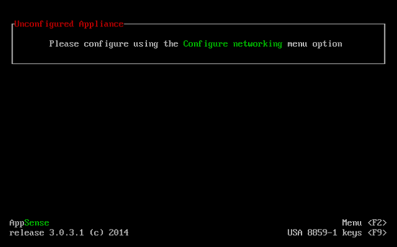
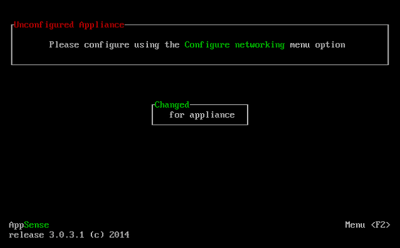
First thing to do is connect to the console of the appliance
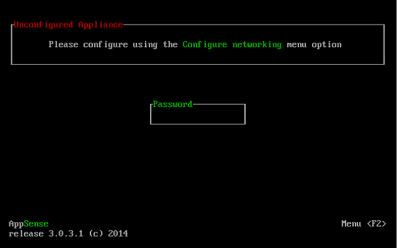
Pressing F2 will bring up the following box
The default password is AppSense (case-sensitive) – you will need to change it at this point.
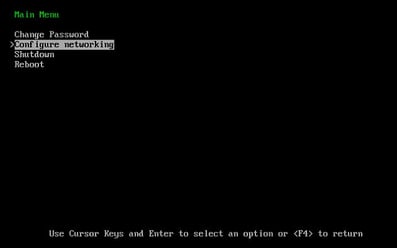
Next, you should see the base menu. Select Configure Networking from the options available.
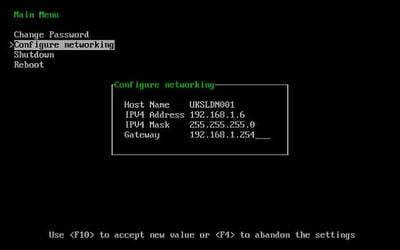
Give the appliance the desired hostname, and assign the IP address to the appliance that you set up in DNS. Make sure that the subnet mask is correct and the default gateway points to the correct routing device on your home network (DataNow needs to be able to communicate with external clients, don’t forget!)
Once you’ve done this, the appliance needs a restart, so the Reboot option would be a good idea 🙂
Web configuration
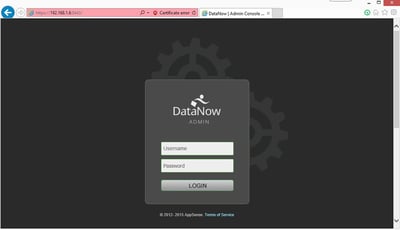
After the restart, the appliance should now be contactable via the web services running on it. For the admin interface, you need to browse to https://ApplianceName:8443
The username is appliance and the password will be whatever you set it to during the console configuration section.
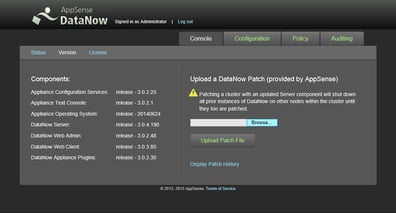
Next you will see a load of alerts warning you about configuration items that need to be completed. But first, let’s install any patches we may have downloaded. Click on the Version link.
Click on the Browse button, and find the patch you downloaded (which should have extracted to a .bin file). Once selected, click on the Upload Patch File button.
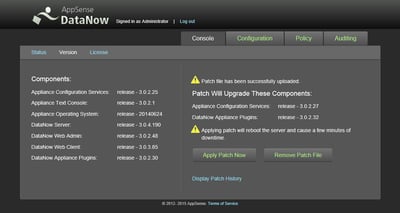
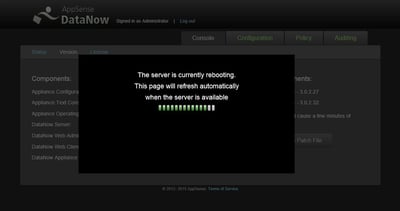
Next, click on Apply Patch Now. This will cause the appliance to restart. If you’re paranoid, it may be a good idea to snapshot/checkpoint the system prior to patching, but I haven’t bothered.
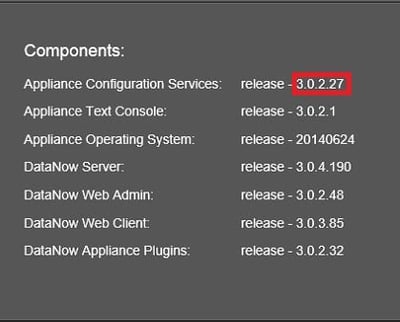
Once the restart is finished, you should see upgraded components
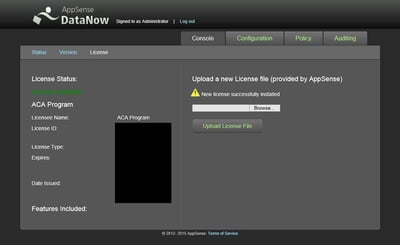
Next, you need to deal with the alerts you saw on the initial screen. Firstly, we need to click on the link to upload a license file. You can request a 30-day trial from the AppSense website. If you have a full license, you will need to use the .txt version, rather than the .pdf.
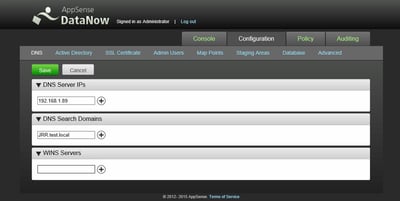
Then it’s on to DNS settings. Click the link and choose the Edit button from the DNS screen. The Edit button can be a bit temperamental – you may need to click it a few times to get it to activate (although this is probably something to do with my old pal Internet Explorer). Input the required values (you shouldn’t need to put anything in for WINS, unless you’ve got a lab from the dark ages, or you use WINS for home drive settings)
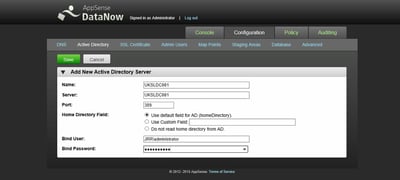
On the list now should be Active Directory settings. Click on the link and click Add New, before setting it up as required.
Interestingly, I was stricken with this error initially (see below) when trying to save the AD details
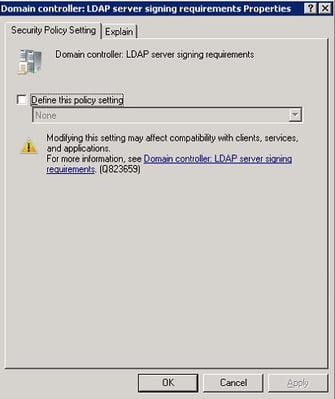
In the DC’s security log, I could see a successful network logon from the account To get around this, I had to disable the following setting from the Default Domain Controllers GPO – Computer Config | Windows Settings | Security Settings | Local Policies | Security Options | Domain controller: LDAP server signing requirements. I needed to set it to None or Not Configured (shown below)
What security considerations disabling this raises I’m not sure, but it certainly worked a treat once I had it done (a gpupdate may be required to sync the new setting).
Finally, and most annoyingly, the next requirement is for a certificate. Those of you who know me may be aware that I passionately hate three pieces of tech – Java, Internet Explorer 10+, and certificates. You can run DataNow without a proper certificate – but given that the DataNow client won’t connect without it, it’s kind of a pre-requisite, unless you want to use the web version permanently.
In the interests of keeping this simple, I installed the Active Directory Certificate Services role on my DC along with the role services for CA Web Enrolment and Network Device Enrolment Service. Those of you that are less cert-aphobic than myself may find using another enterprise CA solution much easier.
Without getting too deep into the certificate side of things, I generated and installed a certificate by following the instructions in the online help - but do bear in mind that you will need to tailor this process based around your CA solution.
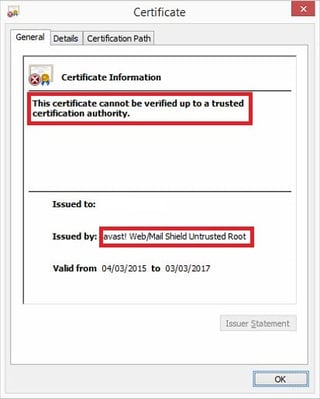
Testing this worked OK after installing the certificates – as long as I disabled the Avast antivirus which is installed on my host machine. For some reason, Avast is opting to mark the certificates as untrusted (see below for the certificate error reported from the web site)
If we disable the Avast processes, though, the certificate appears all well and good
This is odd, but an internal certificate error isn’t that much of a big deal – we can simply click through it, and external access is probably the key part of the product anyway 🙂
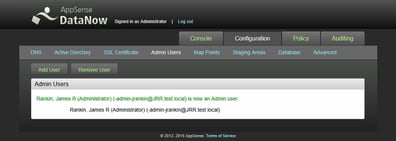
Finally, click on Configuration in the admin console and choose Admin Users. Add in any required administrative users from your domain, if you wish to use a separate account to administer the appliance.
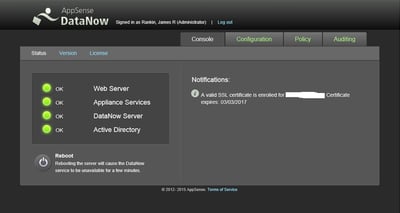
Once all these steps are finished, you should see a nice green interface on the initial screen of the admin console
Network configuration
Now that we’ve got the DataNow appliance running (you can connect to the standard user web interface by browsing to https://appliancename), we need to make it available externally. The DataNow appliance listens for connections on port 443, so what we need to do is set up your home router to forward connections onto the DataNow appliance on the correct port. Obviously your device will be configured differently depending on what it is, but the port forwarding principle is the same – pick an external port, and forward it onto port 443 of the DataNow device (specified normally by IP address). As I connect from a lot of places and sometimes there are some restrictive outbound firewall rules, I’ve opted to forward my router’s port 443 onto the DataNow appliance’s port 443. Below is a configuration example from my BT router.
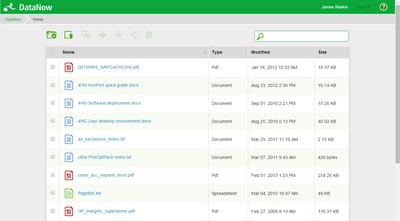
Once you’ve done this, you should be able to connect to the DataNow web interface by connecting to https://DynamicDNSaddress-or-PublicIPaddress (if you’ve specified a port other than 443, don’t forget the :portnumber on the end!) from an external location. If you’ve configured your certificates and port forwarding correctly, you should be able to log in using your domain credentials and see the contents of your home drive.
Client configuration
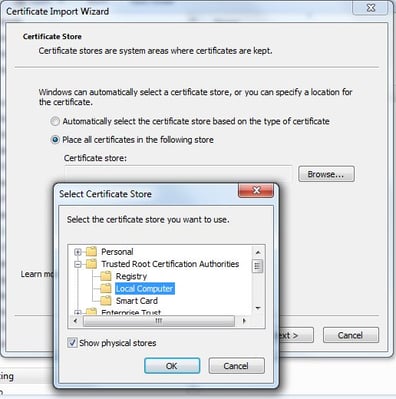
Now, if you want to install the full DataNow client on an external computer and access your files and folders, firstly you will need to install the exported certificates you generated earlier into the Trusted Root Certification Authorities for the physical store (see below).
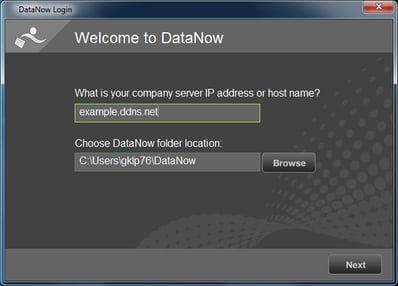
Once the certificates are installed correctly, you will need to download the relevant client from the AppSense website and install it. After it installs, you should see some configuration dialogs.
First fill in the name of the server (either use your dynamic DNS name or the public IP) and choose the local location of your DataNow folder.
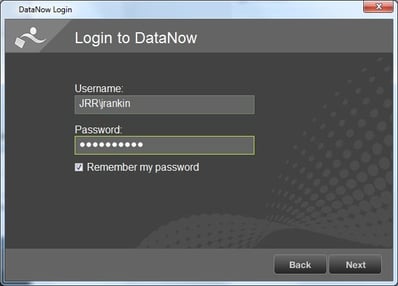
Next simply supply your username (with domain prefix) and the password to accompany it.
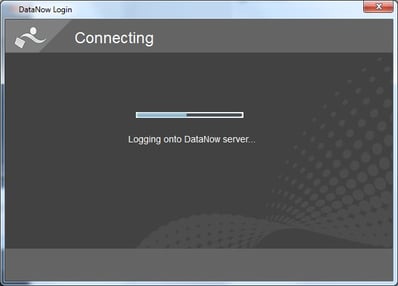
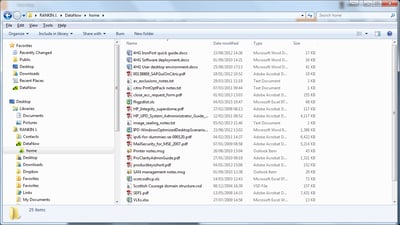
The server will log on (assuming everything is configured correctly) and you will then see DataNow synchronizing the items from your remote file storage into your local DataNow folder! Cool!
Mobile synchronization
The DataNow client also runs on OSX, Android, and iOS, so you can sync up your files to any devices running these operating systems. Simply install the client from the AppSense website and you should be good to go, with the same minimum fuss we saw for the Windows client.
Summary
So, that covers a quick setup of DataNow in a home lab situation. You can use your DataNow appliance for PoC or demonstration purposes, or even as a full-featured EFSS solution for your own use.
Don’t be fooled by the limited usage we’ve demonstrated in this article – there are lots more additional collaborative features in DataNow than simple single-user folder synchronization. We will cover these in a future post.

