Some parts of the EM endpoint configuration for an AppSense-managed system – such as node timeout – can be controlled by setting various Registry values. However, if you click on the Tools tab in Environment Manager and select Custom Settings, then click the Add button, you will see a list of options that can be added through the console rather than managed through Registry settings, making life a little easier when deploying certain customized settings to your endpoints.
Custom Settings are deployed as follows:-
Open an Environment Manager configuration
Click on Tools | Custom Settings | Add
You can either leave the setting as the default or configure it with your own custom setting. In this case we have unchecked the default setting and put our own in
Click OK, and then save and deploy the configuration as normal. Now the settings defined will be deployed to each endpoint as the configuration is pushed out.
Note that, if a Custom Setting is added, it will be created on endpoints or override any existing setting. Custom Settings can be configured to use apply the default value for that setting or to use the value you assign it; both will override existing settings. If a Custom Setting is not added, that setting will not exist unless it is already configured on the endpoint, in which case that value is used.
Also, if Use Default is selected for a setting, the relevant keys and values are actually removed from the Registry on the endpoint – it is not actually required to be there for the default behaviour to apply.
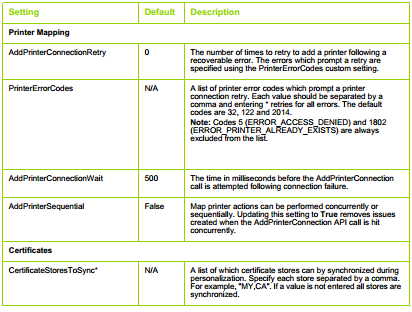
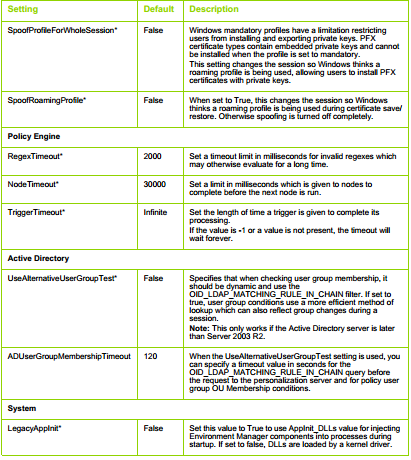
The list of available Custom Settings, and a quick description, are available on page 159 of the AppSense Environment Manager Policy Product Guide. For posterity, they are reproduced below. The settings followed by an asterisk (*) require a service restart before they take effect.


